Saturday, September 17, 2011

{Little Girl Crossover Purse}

My daughter has masses of dress-up purses (my old ones), and lots of Princess and misc bags to play with. We actually could purge a few! But as she played the other day, I realized that when we go shopping with her money or gift cards, for some reason I'm still in charge of the currency. Not really intentionally, just out of habit.
At 7, it's about time she kept up with it a bit!

Enter: Mom...with a "little girl purse" idea.
I started measuring her. I knew I wanted it to go across the body so it didn't get lost in the excitement of Barnes & Noble or Build-a-Bear. (Anyone else have daughters?)
Here's what I came out with, using old jeans from my stash and misc scraps.
I had a 'first', and didn't put the straps inside the lining. Instead I finished the ends and sewed them in an "X" to each side, then added a button for looks.
Here's the skinny if you want to make your own!

Lining (2): 7 1/2" x 8"
Exterior (2): 7 1/2" x 8"
Straps: I cut her strap fabric to 2 1/2" by about 37", but measure your own kiddo for accuracy
Fusible fleece for the strap
Buttons, embellishments, Wonder Under, misc.

The body is made from jean pant legs, the straps are literally made of scraps, and the flower on the front I die-cut with my Cuttlebug and ironed on with Wonder Under. I think I boxed the corners at 1".

 My fave part is the strap. I've never made anything "scrappy" with fabric (not sure why), and I love how it turned out.
Perfect size for her cash, gifts cards, chapstick, and sunglasses!

Have a nice day!

Monday, September 12, 2011

{Halloween Coasters...I Couldn't Wait!}

Halloween is my VERY favorite time of year to decorate! Love, love it! I think I enjoy it more than Christmas simply because there's no stress surrounding it, you know? I just get to enjoy it. I go a little nuts with the treats and the decorations, and I love every minute of it. I can't wait to post some of my fun Halloween projects! 
To start things off a little early, I whipped up these Halloween coasters and table mat with some scrap fabric my Mom was going to throw out. (What??! Throw out fabric?! She's crazy!) So I snatched it up a few months ago and when I got that ol' Halloween feelin' this past weekend, this fabric called to me. (Okay, it really called to me because it was free, but it's pretty cute, too.)

Halloween Coasters
Super simple!
I cut each square to 5 1/2" x 5 1/2", along with 2 pieces of fusible fleece for each coaster to make them heavier and a bit quilt-like. Iron on your fusible fleece, pin right sides together, and sew on 3 sides. Then I turned under the final side and topstitched 2 rows all the way around, just for interest. I made 4 all together.

While I was at it, I made a placemat of sorts to set on my table under my centerpiece.
I only used one piece of fusible fleece, and you could certainly make several of these to be actual placemats. For some reason placemats really drive me bonkers, so this one will just go under a centerpiece (which has yet to be pulled out). My hubby would kill me if I started Halloween decorating this early but I definitely could!  It measures about 18" x 13" I think.

So I've gotten started and I can't wait to pull out our Halloween boxes to see all the surprises I've forgotten I made last year. :) This week I'm planning to make some of this SUPER cute Candy Corn Bunting . It's perfect for my staircase!

Enjoy!


Thursday, September 8, 2011

{Organizing School Work}

How do you handle the mound of school work that comes home? I have only one kiddo, and I know I'm in the minority, so I always like to see what others do. There are tons of really cute and sensible ideas out there, so I thought I would share how we handle storing and keeping our school papers.

I start the year by keeping nearly EVERYTHING. And I mean everything. Unless it's a note for an event, it goes in this box:
It's a 12x12 scrapbook box that I got on sale for around $4. Don't worry...it's not the finished product. Although if you have ZERO time and 5 kids, it would be perfect...just cumbersome. :)
But I'm off-topic...so here's what I do next.
I keep everything in the box all year. At the end of the year, I go through everything and throw away A LOT. I keep about 25-30 important pieces of work or projects. All the newsletters and extra paper that has a blank back, we stash in our scrap paper pile in our office. 
Then I gather these supplies:
legal expandable envelopes with velcro or a cord
packing tape
computer/paper


I make up some labels listing the school year, my kiddo's age, the school, the teacher, and the location. You can use large labels for this, but honestly ours are stored in the attic. (We have a really cool walk-in attic that we go in and out of weekly, so we can access these anytime. Not a traditional attic.) I have found that labels in attics (over time) tend to peel with the variations in temperature, so I always use cardstock and packing tape instead. It just works better for me.:) It looks like this:
I add all the work I'm keeping, adhere the label, and file them in this nifty tote.
I love crate ideas...but that just means dust and crud to clean off for me, although they are so cute. A file box is another great idea, but maybe I keep too much, but we would fill that rather quickly. So this is our method, and it works great!
Thanks for stopping by,

Saturday, September 3, 2011

{Trash to Treasure: Goodwill Re-Vamp}

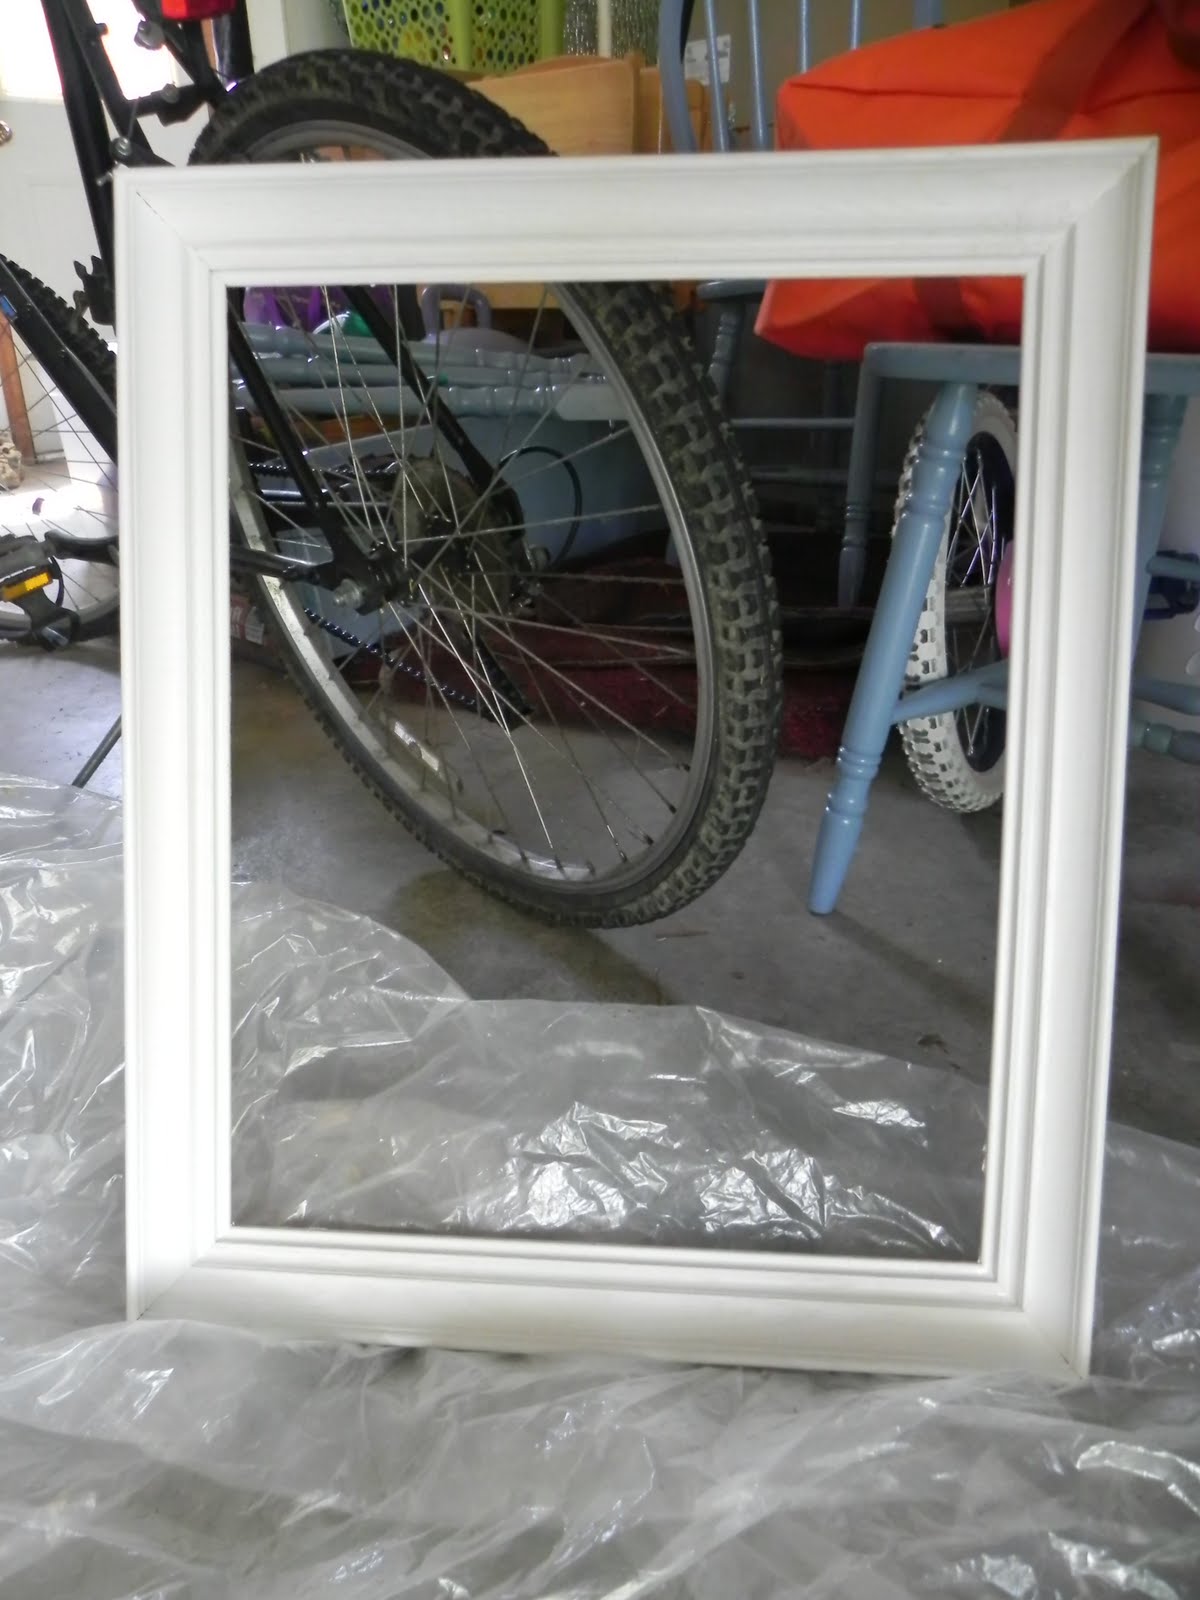
I've seen these wire line frames all over and loved the idea, but I'm just now gettin' to it. I've shopped around for a frame for my daughter's room, but the size I wanted was still more than I wanted to pay. I came across this beauty at Goodwill earlier this week for a whopping $3. Now that's my price!
It was stinky and nasty, but perfect for my plan.

First I scrubbed it with Murphy's Oil Soap-Citrus and pulled the nails out of the back. That was a big difference by itself!
 Then I brush painted it with eggshell white. I was out of white spray paint, and had a perfectly good can of paint on hand. I gave it 2 coats.
Getting better, no? And it didn't stink anymore, which is always a bonus.
I used craft wire I had on hand for the 'lines', but it was brass-colored. Yuck. I wasn't going to spend $5 on a new spool of craft wire, so I rummaged through my spray paint and found some odd gray-ish, tan-ish, platinum-ish from I-don't-know-where. (Sound like a paint expert, don't I?) I don't have a pic, but I cut my wire to the correct length, taped them to a step stool top, and sprayed that ugly brass off with my gray-ish,tan-ish,platinum-ish. Perfect.
I stapled the wires to the back side and voila....

I added the rolled felt flowers after I saw this tute over at My Heart is Yours . Super, super easy. I could make those all day! Using scraps of course....
I hot glued those on, and added these little clothespins from Michael's $1 Spot that I picked up a few months ago (anticipating this 'someday' project).
They're super cute and match my kiddos room.
So now we have to hang it, but we are always needing a spot in her room for a current picture, card, or whatever else she deems "special". I'm not too hot on tacks in a child's room (even if she IS 7), so this works wonderfully and is super-cute to boot.
I spent $3 all together, which you just can't beat either.

Thanks for stopping by!
Linking up at these parties:


 Tatertots & Jello Weekend Wrap Up Party
 UndertheTableandDreaming
Sundae Scoop

Monday, August 29, 2011

{Sorting Paper Scraps}

As a stamper and scrapbook gal, I struggled for years with the best system for maintaining (while still using) my paper scraps. I looked for ideas everywhere, but really nothing I tried seemed to actually work for ME. I found that I saved them, but then never used them. A friend of mine once suggested just using ziploc bags, and as rudimentary as it sounds, I actually did that for a while. I tell you this because the ziploc bags then inspired me to step up a bit. I started doing this several years ago and it has been perfect for me!

I purchased this scrapbook paper organizer at Walmart a few years ago for $4.95. It's about 15" x 15" or so.
It came with little file tabs. I sorted my scraps into color groups, then...(and prepare yourself here)...
I went VERY high tech and took a permanent marker to some return address labels.
Can you tell how academic, precise, and creative this method was? ;)
These are sort-of the color groups I chose, although I actually ended up changing a few. Black, brown, and grey each have their own file, and there's one just for neutrals (tans, creams, and whites).
Then I took 10 seconds to painstakingly adhered my labels to the file tabs.
It created the perfect place for paper scraps of ALL sizes.

It sits below my table, to my right, within arm's reach. I go to it ALL the time to pull scraps. It's really never snapped shut, and I find that I actually USE my scraps with this system. It's been working for me for several years now....which is good, since it took me so long to put together. :)

Hope this helps you get your own paper scraps organized. Best $4.95 I've spent for my craft room!
Have a wonderful day!
I'm linking up!
 Somewhat Simple

Wednesday, August 24, 2011

{Play Money: The Way to Learn}

My 7 year old has had old scraps of handwritten makeshift play money for a long time, and although it works, it could be better. When she's playing store, or paying her vet bill, or shopping at the pet store, she really should be counting out something close to real money. You know...playing and learning. It's how we roll around here, so I can't believe I haven't made these earlier. I think I printed out some generic bills a few years ago on green cardstock, but let's just say....uck. Not the ideal.

So I did some searching and found these wonderful printables at Money Instructor. You can download $1's, $5's, $10's, and $20's. They look very real, but are smaller in size than the real thing.
$50 Bills-Play Money
 I printed several copies of each on white cardstock and cut them out.
(I use Georgia-Pacific cardstock from Wal-mart for general projects.)
Then I sealed them up with clear laminate (from a roll) for durability, and cut them out again. Rolling over the laminate with a brayer (or rolling pin) really helps get the bubbles out quickly.
 They are durable and very authentic...perfect for learning while playing.
  Wouldn't it be nice if these were real?
Have fun pretend shopping (and counting) with your kiddos!

Take care,
Linking up at: