Showing posts with label craft room. Show all posts

Monday, August 29, 2011

{Sorting Paper Scraps}

As a stamper and scrapbook gal, I struggled for years with the best system for maintaining (while still using) my paper scraps. I looked for ideas everywhere, but really nothing I tried seemed to actually work for ME. I found that I saved them, but then never used them. A friend of mine once suggested just using ziploc bags, and as rudimentary as it sounds, I actually did that for a while. I tell you this because the ziploc bags then inspired me to step up a bit. I started doing this several years ago and it has been perfect for me!

I purchased this scrapbook paper organizer at Walmart a few years ago for $4.95. It's about 15" x 15" or so.
It came with little file tabs. I sorted my scraps into color groups, then...(and prepare yourself here)...
I went VERY high tech and took a permanent marker to some return address labels.
Can you tell how academic, precise, and creative this method was? ;)
These are sort-of the color groups I chose, although I actually ended up changing a few. Black, brown, and grey each have their own file, and there's one just for neutrals (tans, creams, and whites).
Then I took 10 seconds to painstakingly adhered my labels to the file tabs.
It created the perfect place for paper scraps of ALL sizes.

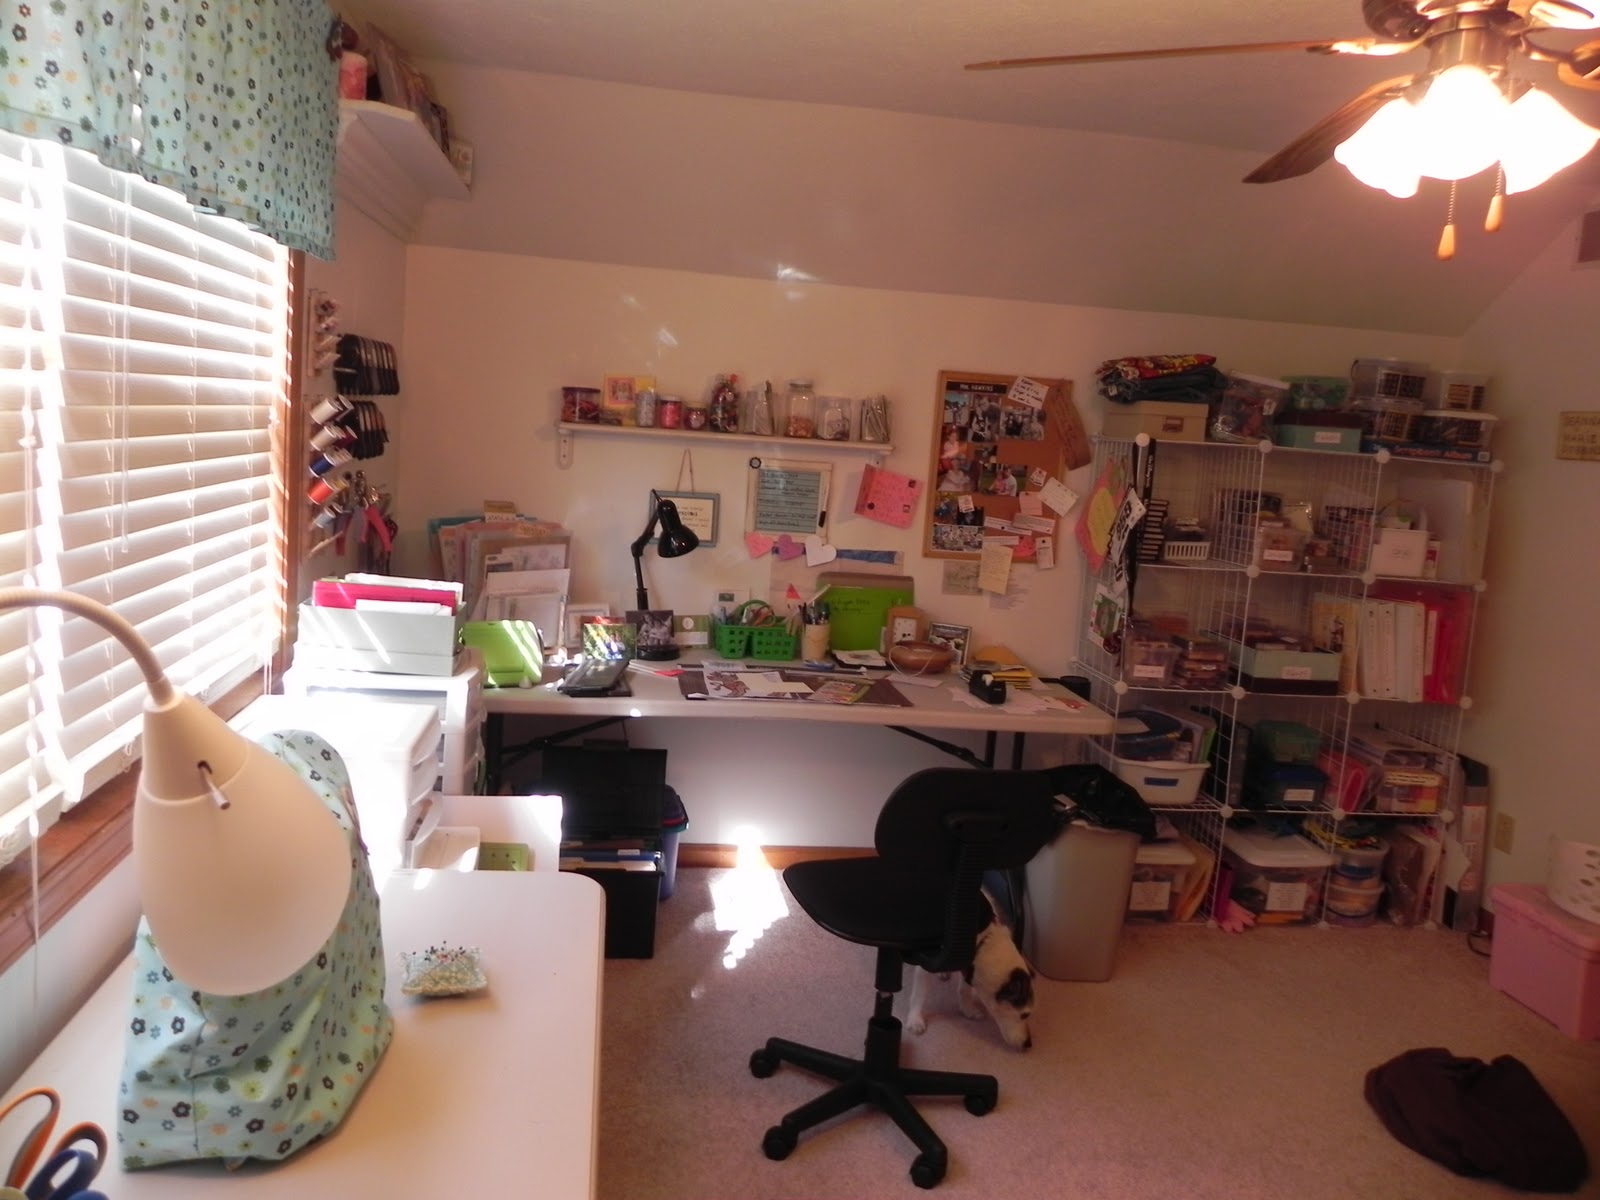
It sits below my table, to my right, within arm's reach. I go to it ALL the time to pull scraps. It's really never snapped shut, and I find that I actually USE my scraps with this system. It's been working for me for several years now....which is good, since it took me so long to put together. :)

Hope this helps you get your own paper scraps organized. Best $4.95 I've spent for my craft room!
Have a wonderful day!
I'm linking up!
 Somewhat Simple

Wednesday, April 27, 2011

{Greeting Card Organizer}

I generally make many of my own greeting cards, although of late my stash has been dwindling as I work on other things. BUT...I still need an organized place to keep them all! So all the cards in my storage box are handmade, but if I bought greeting cards, I'd put them in here, too. It's so much easier to find everything, and hey...let's face it...it's another excuse to make something! :)

I use cut up food boxes from my recycle bin, scraps of patterned paper, and my tab punch from Stampin' Up. You can just cut a small tab also if you don't have the punch.
I got a really general idea of the size, then cut them from the cereal boxes. I used glue stick to add the scrap patterned paper (you could Mod Podge, but really for this project I just didn't think it was necessary). Then I sanded the edges a bit to get them the right size. I punched a tab for each one from scraps, added the titles, stapled them on, and voila! Cards are organized and even cute. :)

My box is one of those photo boxes that are always 50% off at Hobby Lobby.
Check in a little later this week for some re-org on the little one's toys/dress-up things. I feel a relief with just a few small changes!
Thanks for stopping by,
I'm linking up to these parties:
Tip 
Junkie handmade projects

Saturday, March 5, 2011

{Photo Clothesline}

I've had my fave photos on a very plain corkboard in my craft room for forever, and it would probably still be that way if it weren't for my need for wall space. I recently made a new ribbon organizer and I needed/wanted it on the wall. That meant removing the corkboard, but I couldn't part with my pictures. I had a long narrow section above my embellishment shelf and a stack of clothespins from my teaching days. 
First I had to make the clothespins cute, and whaddya know I had some patterned paper that coordinates with my room. It's getting a little weird. I traced the clothespins onto the paper, cut them out, then made them pretty with the coolest thing ever made....MOD PODGE!!!!!!  I then sanded all the edges. I used jute twine and these cool wooden star nails I found at a primitives shop a couple of years ago.


Here's how it turned out:

Actually it's much better in the room anyway, and I have the space I needed for the drawer-turned-ribbon organizer . I swear if I hung clothes out on a line I would make some cute clothespins to hang, too!
 How do you inspire yourself in your own craft space?
Have a good one,

Monday, February 28, 2011

{Inspiration Strip}

As I was streamlining a few things in my craft room this weekend, I realized that I like to pick up little things...quotes, movie tickets, memorabilia...and then it tends to "hang" somewhere in my craft room until it becomes nothing but clutter! One of my clutter areas are my 5K race numbers, a source of pride and inspiration for me. I ran my first 5K last Spring, ran 2 more with a new PR each time, and look forward to more this year. I keep my race numbers and race times visible to remind that I did it (!) and want to do more. They were previously clipped to my metal shelves, so yesterday afternoon I made a long strip to hang them on. I like it much better!
I used scrap fabric that coordinates with my room, along with some major interface scrap piecing, and stitched it up. I added a ribbon at the top for hanging, then pinned my race numbers to it. It's plenty long enough to add more, because I can easily overlap my numbers more if needed. 

Something like this would be great for pins (Disney??!), or medals on pins (I got tons of those growing up for singing and instruments), or badges of any kind. Even barrettes, although I've seen much cuter ways to display those. At any rate, it works well for me! I'm anxious to add more in the next couple of months.
Thanks for stopping by!

Sunday, February 27, 2011

{Old Drawer Turned Ribbon Holder}

I saw this FABULOUS idea for ribbon storage recently over at Blue Cricket Design. I think it's genius, just like most everything over there! I don't use my ribbon all the time, but I have found that when I can see it, I definitely use it more often. I've looked at ribbon organizers so many times, but never found anything that I liked enough to buy. We found this homeless drawer in our garage a couple of months back, but it never occurred to me that it could be useful until I saw this post. This one doesn't stand on it's own and is pretty shallow...it's definitely not from a dresser...but it works well for this and I wanted to hang it anyway (vs. standing it on a table).

So here's my version:
My sweet hubby added the dowels for me, as well as a little bottom shelf from scrap wood. I can always add one more dowel in the future if I need it.
Here's how the drawer looked when I found it:
I removed the side rails first, and didn't even prime or sand this. It's really heavy wood, and honestly just as a ribbon holder and knowing I was going to distress the edges anyway, I really didn't see the need.
We basically just used the ribbon spools to adjust the dowel placement, hubby added the shelf at the bottom, then I painted 2 coats on before distressing the edges. It works perfectly in my craft space, and holds all of my ribbon. Love it!


The drawer idea has really inspired me to try something totally different with another drawer, and I can't wait! I really need a dresser drawer for that project though, so I'm heading to the junk shop next week to see what I can find!
Take care,
I'm linking up to these great parties!


Photobucket

Tuesday, February 15, 2011

{Craft Room - Part 3: Finished!}

To complete the sharing of my craft room, here are some pics that pull it all together. I'm blessed to have a room all to myself, but it wasn't always that way and certainly isn't necessary. Just a corner or small section of any room or closet will serve the purpose well. Here it is!  :)


I have a 6ft table for the majority of projects, and a 4ft sewing table...although I'm currently hunting for an old desk to refinish for my sewing area. My 4ft works just fine, but it is a bit shaky at times, and I know a solid desk would "feel" better overall. It has served me well though.

I don't know about you, but I like to fill my space with photos! No surprise, since my home is loaded with framed photos, so the craft room is no exception. I have lovely chunky crown-molding-type shelves on either side of the double window, so I filled those with framed photos I love.  I also use the side of my Target wire shelves to hang art work, quotes, and my 5K race tags. They keep me inspired!
 Aren't these cool?

I have an over-door wreath holder where I currently keep the bags/purses I've made until I give them away. This seems to be working well for now, but if I start selling, I'll need a better method.

I see so many wonderful organization and decorating ideas for craft areas, and they really all are an inspiration. I think the key is finding what works for YOU, and will keep your stuff accessible and easy to find. Have fun in your own craft spaces, and send me your links to share. I would love to see them!!
If you have any questions, feel free to email me anytime.
Thanks for stopping by!


Sunday, February 13, 2011

{Craft Room-Part 2: Organizing}

If there's one thing about being a crafter, you definitely have to have at least a LITTLE bit of organization! I could spend my day happily organizing anything that's put in front of me, so it's actually a joy to take on.
Since moving in less than a year ago, I've purged some things and done some re-organizing for the better. Here are some things that really work for me!
Tool Storage
 Not all of my tools are here, but a lot of the ones I use frequently are. Punches, thread, scissors, etc. The rails are from Ikea. I love it that I can see all of my punches!
Like Items Together:


  I use ice cream buckets for  A LOT of stuff around the house, and they work great for my el-cheapo foam alphabets that I use ALL THE TIME. I cut out the front label when I buy them and seal that to my ice cream buckets with packing tape. So easy to find the font I want, and I don't have to have every.single.stamp (!) lined up in a small package to put them away! 
I recently upgraded these show boxes from cardboard to cuteness with 12x12 paper and brown spray paint I had in the garage. It was on one of my days when I was coordinating, as you can tell. They match my color scheme. :)

They're perfect and free!
Paper Storage:
I have several 12x12 drawers, and a file box for my 8.5x11 papers. Labels, labels, labels!! I use clear 12x12 folders from the Target $1 spot for projects. This one though holds Disney papers only.


  Project Organization:
I have a Pampered Chef pan lid organizer that I got free at a party once. It sat in my cabinets under utilized forever until one day I found a great use for it. Holding my project folders!
Before 
After
I keep my Cuttlebug plates in the front, sticker folders, and any specific project folders in there as well. Also really big chipboard pieces I save.
Embellishments:
I've got small cases with really small pieces in them as well, but I've found my jars to be great for things I use often because I can SEE them. (Things that don't get seen, usually don't get used!)
The previous owners left a ton of canning jars in the garage, so I put several of them to use on a shelf above my long table.

  Stop back by for some "completed" pics and see it all pulled together.

I'm linking up over @:
http://www.justagirlblog.com/  (can't find a button here this week!)


 The DIY Show Off

Take care,