Showing posts with label recycling. Show all posts

Saturday, July 7, 2012

Rainbow Birthday Party

Hello friends! Our Rainbow themed 8th birthday party was a big success and fun to put together. I promised that I would share, so be warned of lots of pictures forthcoming! I actually love planning parties for my kiddo, and although the guest list for this one was small (8 girls), I'm starting to think that maybe I would rather pay more and have the party elsewhere??? Terrible, I know...BUT...it's not because I don't thoroughly enjoy planning a themed party. It's mostly because I put so much pressure on myself for everything to be "just right" that I then sometimes forget to enjoy it. So...food for thought for next year, I guess!
My just-turned-8-year-old loved it, and that's what counts. I put everything together relatively cheaply, which I always strive to do. (Which is why the above mentioned pay-someone-else idea goes COMPLETELY against my grain.)
We handmade the invites this year, which I like because my kiddo got to help with them. Plus, it's lots cheaper!
We created these in Word, on a 4x6 card, then I rounded the corners with my paper punch. The kiddo added the rainbow at the top.
Each girl took home a small favor bag, that again, my kiddo added a few little touches to. Each bag included Skittles, 3 rainbow markers, and a unicorn rainbow lollipop.
I had a clipboard near the front door where parents could leave a contact number if they were dropping off. This worked really well, and I didn't have to keep up with numbers.
I  whipped up this rainbow pennant....
...and we hung it over the room where she would be opening gifts and playing a few games. (This is the day before the party, so party stuff was still cluttering up that room!)

When each girl arrived, she was directed to write down her estimation of our Skittles jar. They dropped their guesses into a little rainbow box from the Target $1 Spot, and then I went through them during cake/ice cream. Our Skittles jar was actually a pickle jar from our recycling bin. I spray painted the lid with primer, then red spray paint. I tied a scrap piece of fabric for the ribbon, leftover from the pennant project. The girl with the closest guess took home the jar. (There were 300!) :)
 We added mini water bottles to the red bucket, as well as napkins in the front. My kiddo decided to have rainbow iced cupcakes for her party with friends, and a rainbow cake for her party with family. I added the paper pennant triangles to the cupcake stand with simple scotch tape. I cut each of them with a Stampin' Up pennant die.

 We played a few indoor classic games (like Limbo and Hot 'Cloud' ...it was 102 degrees outside), then headed out under a shade tree to make rainbow sand bottles.
I bought the colored sand at Hobby Lobby, and we cleaned and prepped Propel bottles from our recycling bin. We labeled the lids with each girl's name ahead of time, and stocked up on funnels and measuring cups from the $1 store. The girls LOVED this activity! They were all pretty serious about it, too.  Apparently layering sand is serious business.  :)
They all turned out lovely, and I think every girl was proud of her creation!
After cupcakes, ice cream, and gifts, we finished off our fun with a rainbow pinata (a special request from the birthday girl). 
For our large family gathering, we opted for chocolate cake, and added the Skittles rainbow ourselves. My kiddo added all the Skittles (her fave candy), and really loved how it turned out.
Lots of fun, a cute theme, and pretty cheap, too. Although I'm an avid scrapbooker, we've made it a tradition the last few years to create a bound photo book of each birthday party (one with family, and one with friends). I always wait for a discount, which happened to be right after the parties, so both books should be arriving soon. They are so much fun to make and are wonderful keepsakes, too. I use Snapfish, and actually store all of my photos there as well.

Hope you enjoyed our rainbow themed party ideas!
Thanks for stopping by my little corner of the web,


Monday, January 16, 2012

{Lovely Bookmarks}

A shout-out to all the papercrafters out there! Although I just love {creating}, paper crafting is by far my favorite crafty passion. Scrapbooking, cardmaking, and miscellaneous 3D type projects/gifts really make my heart flutter. :)
The last several days I've been in a papercrafting frenzy, making projects right and left. In the preschool where I teach, we do a cool birthday idea for the teachers and staff. Instead of buying a traditional gift for each member of the staff, each month there is a birthday bag for each person who has a birthday that month. Everyone is supposed to add to the bag with an item that is only a $1-$2. At the end of the month we have a birthday lunch, and the birthday girls get a bag full of little goodies.
I love the idea, because it doesn't break the bank and often I feel like the little things are the most meaningful.
Instead of flying by the seat of my pants so-to-speak and waiting until the last day to add to the birthday bags, I've been stockpiling gifts for the remainder of the school year. I'll try to do a post for each project, so keep checking back for simple, papercrafting goodness!
Today I wanted to share these sweet bookmarks.
These measure 2" x 7", and the base is made from good ol' cereal boxes out of our recycling bin. :)
I adhered quality cardstock over the cardboard, then sanded the edges. I die cut and embossed the butterflies with a Sizzix Die, added a brad in the center, and some lovely ribbon at the top. On a couple of them I also distressed the edges with chocolate ink.
I adhered the butterflies with sticky strip for extra security. I packaged each one in a cello bag, and tied it with raffia. I will add one more tip and say that for bookmarks, I think you definitely need quality cardstock/papers. I use Stampin' Up cardstock for mine because it really is the best in my opinion. It's very heavy, which you need for bookmarks. Lower quality cardstock is fine for other projects, but bookmarks look better and last longer with heavy cardstock. Just a tip! :) It's frustrating to make something lovely and then realize that your paper is just too thin to stand the test of time. (I've been there and done that!)
 Perfect to add to the birthday bags!
These are really simple to make, and the original I made myself a few years ago still looks beautiful in each book I devour. :)
Any homemade gift says "thinking of you", don't you agree? 
Look for more easy paper goodness to follow. I've been busy!
Thanks for stopping by and let me know if you have questions.
I'm linking up over at:
Friday Flair @ Whipperberry
 

Thursday, January 12, 2012

{'All About Me' Booklets for Dolls}

Santa added a second American Girl doll to our home this year and the fun hasn't stopped. Dare I say that Mom likes all this doll stuff as much as the kiddo does? I hate to admit it, but I get a little pulled in to the tiny realism! My kiddo was wishing out loud for little booklets for each doll to write down their favorite things. Alas, she was writing on PLAIN scrap paper that had no flair at all. What???! So I went to my own scraps (the scraps with flair) and came up with these.
I made these exactly like my Scrappy Quote Chipboard Book , I just changed the size. Again, I used cereal boxes as my chipboard, and adhered scrapbook paper to both sides of that to make the front and back covers.
I created the pages in Word, and printed them on white cardstock.
One likes horses and one is from Hawaii. :)
 I punched the holes with my Crop-a-Dile and bound the books with hemp cord.
These are 5x7 for the overall measurements and my kiddo {loves} them! She wants me to make one for her, but since she's a living, breathing-not-plastic-and-stuffing person, I think she should have the store bought version. :)
If you'd like to make some of these for the 18" dolls in your life, you can download the pages I made here:
I also added one blank page at the end just for drawing or miscellaneous.
Have fun playing!
I'm linking up to these parties:


Sunday, January 8, 2012

{DIY Lunchbox Notes}

School started on Wednesday (back to the old grind for all of us!) and as I was thinking about lunches for the week, I realized that my little basket of lunchbox notes was finally about empty. Time to restock! I have several versions of lunchbox notes saved on my computer...really cute, very easy to print and cut out, very convenient. Then I remembered that I'm low on printer ink. Ugh...don't want to a)go out and get more at this point or b)spend more $$ on it unless I have to. I have to print lots and lots, but lunchbox notes is NOT one of them! :)
So I stepped into my craft room and said to myself...."Woman, you have LOADS of unused paper lying around...masses of stamps and stickers...WHY do you need printer ink?"
Now of course I can write a quick note on scrap paper, and without a doubt, the love is still there. Some of my favorite love notes from my sweet husband have been on a napkin. You've got those, right? BUT...since I'm a crafty lady and my daughter likes cute stuff...I had to go a little further, while still keeping in mind that the reality is that these will get PB&J on them and will go in the trash. (Meaning, I'm not making little masterpieces either!)

You know all that 12x12 white paper that they stick in scrapbook sleeves?
Do you keep yours? I always just stick it in this organizer. My kiddo uses it for art projects at times, and I use it for stamping scraps as well. It's perfectly good white paper and I have tons of it.
So I grabbed a few sheets of it, a couple of journaling stamps, ink, and a stamp set I have from Stampin' Up with cute sayings and little critters.
I started stamping, trying to space them on the page to allow for cutting out and leaving a small blank side for my handwritten note.
Then I cut them out and added them to my little note basket that is hidden in the kitchen cabinet. She knows I write them, she just doesn't know where I keep them. :)
It's a little silly, but it's gratifying to create with scrap paper, whatever craft medium you can scrounge up, and save money at the same time. Will I still need to buy printer ink? Yep! But I'll only be using it to print what I really NEED to print. And...handmade lunchbox notes is just a {little} extra love, isn't it?
Have a good week!

I'm linking up over at these fun parties:

Sunday, January 1, 2012

{A Little Inspiration}

The New Year is upon us! Where did the time go? I'm not one for making resolutions, but I do like to have inspiration around. I'm a lover of quotes, and I tend to collect them. Anybody else do the same thing? I actually started saving them on my computer a few years ago, and whenever I find a new one that inspires me I just add it on. I like to go back to it occasionally, and when I do I always find at least one that is a good reminder or food-for-thought for that particular day.
So...as the New Year approaches...I thought maybe I could collect these wonderful bits of wisdom into one little custom book just for me. I'm really pleased with the way it turned out, and it was so simple to put together. You can make this mostly with things you probably already have lying around.
Here's what you need:
scrapbook paper
paper cutter
adhesive/glue stick
cardstock
hemp cord, jute, twine, ribbon-your choice for the binding
cereal boxes from your recycling bin
scrap ribbon or buttons for embellishments (as you see fit!)

I started by using my trusty 'quotes' file from my computer. I tweaked my fonts a little bit, then oriented them a little differently into a Word document. I printed them on cardstock, cut them out, and distressed the edges with brown ink.
Next, I cut my cereal boxes down to pages that are 5x7. I then went through my scrapbook paper and cut several pages to 5x7 as well. Since this isn't a keepsake project with photos, I simply used glue stick to adhere the 5x7 scrapbook paper to the 5x7 cereal box pages. I used a small sanding block to smooth out all 4 edges of each page. This distresses the edges a little bit and also makes it look very even and neat. (You can use a nail file for this as well.) Here are the finished pages:
 The next step is optional, but since I have an addiction to distressing, I also inked all the edges of each page to give it an antiqued look.
Once you have your pages the way you want them, just start adding your quote blocks any way you like. I also glued these down with glue stick instead of adhesive. 
When I rearranged my quotes in Word, I tried to make them various sizes to add interest to my pages.
Next, I used my crop-a-dile to punch 2 holes along the left side of each page for binding with the jute twine later.
 I used scrap pieces of ribbon and buttons for a few extra embellishments. It's a good idea to punch holes before adding embellishments. Don't ask me how I know this. ;)
I used jute twine to bind my book. I love jute because it looks rustic and is sturdy. Get your pages in order, lace the holes, and knot. The pages turn really easily and I can lay it flat.
I printed out a title on cardstock as well, and then adhered it to the front. It now has a happy place directly in front of me at my craft table. :)


I can see making a smaller version of this for a purse or school bag, can't you? Like a little pocket full of thoughts to ponder.
I'd love to hear what you think!
Have a great week!
I'm linking up over at:

Sunday, November 27, 2011

{Laughs for Christmas}

We made up this little joke jar last year, and anxiously pulled it out last weekend for another year of Christmas laughs. Just a quick little joke out of the jar every day puts a smile on your face!

Here's what you need to make yours!

Plastic container from your recycle bin (this is a parmesan jar)
cardstock
jokes!
 I got my jokes from Holiday Jokes @ Teach Mama and also through a Yahoo search.

Clean out your container, type up or print your jokes, then cut them out and fold up.
Have your cute kiddo(s) make a title for your jar. Ours is called "Christmas Funnies". I just added a belly band of red cardstock for the base, and added her title to the front.
There you go...a little holiday joke jar to spread a smile every day!
 When I come across a new joke, I just jot it on a scrap piece of paper and add it to the mix. Keep the  collection growing! And hey...if you re-use a parmesan jar, it already looks festive. :)

Have a wonderful week!
Tip Junkie handmade projects

Wednesday, October 12, 2011

{Halloween Countdown Flip Book}

Been a little crazy 'round here since I started teaching preschool 3 mornings a week. After 7 years of being at home, it's a bit tricky to get back in the swing of working, even just part-time! I'm enjoying it though, and finding my crafting time to be even more rewarding right now as I work to carve out time in smaller portions than before.
I saw this really cool Halloween Desktop Countdown Calendar a few weeks ago over at The Polka Dot Chair. I put it on my to-do list and within the week I had it finished. I had SO MUCH fun making this project!! I followed the really easy tutorial and I {love} how it turned out. I had not made a flip book like this before.
I made a few changes to accomodate my own book. Instead of buying pre-packaged chipboard, I cut my own out of cereal boxes from my recycling bin. Believe me, it is the perfect "chipboard", and I've yet to buy the real thing for any of my chipboard projects. So dig through your recycling!  :)  I cut each page to 8x8, and for that size, I needed the super size boxes of cereal (which I always buy).
I picked up a huge page of cardstock Halloween shapes from K&Co. (on sale) for around $3, and the rest of the papers were from my Halloween stash (which is hefty because it's my favorite holiday!)
I adhered each piece of scrapbook paper to the cereal boxes with Tombow glue. The back of each page is simple black cardstock. Most of the embellishments are also glued on with Tombow, although I also used snail for a few things.

I went through old photos and snagged 10 that I thought would be great in the book. I really liked how they looked as B&W in the tutorial , so I easily converted them all to grayscale using my Irfanview. All of the photos started as 4x6, and then I trimmed them as needed.

(above) One of my favorites!
The best part about this project was that since I actually wasn't recording any memories with words/journaling (like I do in my regular scrapbooks), I could just DECORATE each page. That was ALL I had to think about. Don't get me wrong, I {love} to record memories, journal, and find a way to get masses of photos in a small spaces on 12x12 pages, but just being able to create pages simply for the cuteness factor was a really nice change.
(above) My baby's First Halloween!  (sniff, sniff)
And here's a pic of the book when it's laying flat:
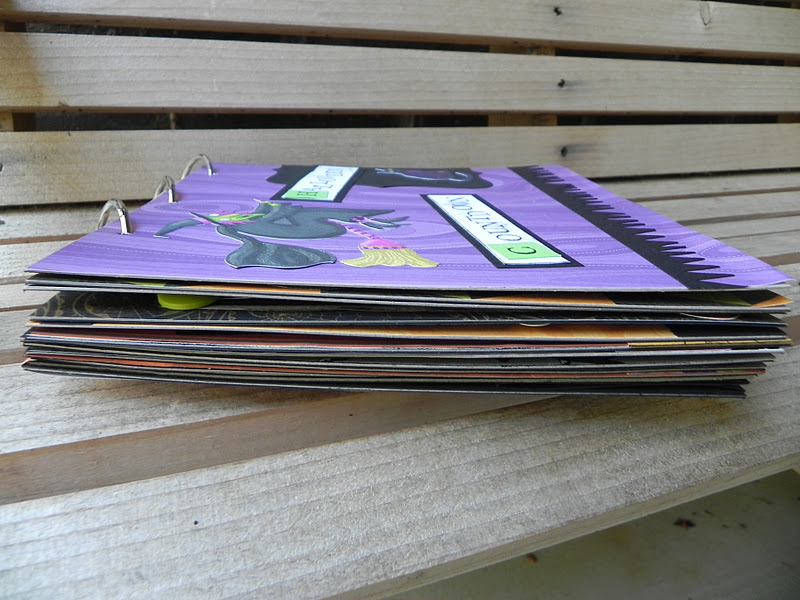
I had a side view of the 'stand up' part, but it disappeared somehow. You can tell that it stands up, and really the tutorial is super easy.

I think I'm going to make something similar for Christmas!
Thanks for taking a look,