Sunday, July 31, 2011

{Upcycled Drawstring Bag & Tutorial}

I was recently inspired by this cute Pant Leg Bag over at Then She Made... . She's got such a creative blog! I saw it and put it on my to-do list, although I knew the original was not quite what I could use. So I tweaked it a bit for my needs and here's what I came up with this past rainy Sunday afternoon:
I haven't done many tutorials, so please let me know if there's any confusion or something I've just blatantly left out! I'm happy with how it turned out and best of all (again), it was FREE (!) using materials on hand and a pair of outgrown size 6X jeans. I hope you enjoy making it as much as I did! 
We are using this to keep Barbies under control when they're not in use. :)

You need:
1 pair of jeans (these were 6x)
thread, machine, pins, scissors, etc....your basic sewing stuff
1 length of grosgrain ribbon, a shoe string, or any other tie of your choice

1. Cut off the old jeans, just below the crotch.
 You can use the top part to make a little girl's Denim Purse on another day! :)

2. Cut alongside one of the fat denim seams on each leg, making each leg lay flat.

3. Pin right sides together and sew on three sides. It's up to you whether you put the thick hem at the top or bottom of your bag. I chose the bottom, but I made this on a whim. If I make another one, I'll put the hem at the TOP, so I can sew it down and not have to worry about raveling. Live and learn! :) Don't sew all the way up on each side. Leave about 2" open.

4. Box the corners. I'm not too great at explaining this, but you can google it and find great explanations all day. I'll give it a go...Measure 2" from the side and bottom of each corner, making a 2" box. Then cut these box corners out and throw them away. This will give your bag about a 2" base.

 5. Stitch the boxed corners closed. Pull the corner apart and flatten it, then sew it down. I snipped some of my thick denim hem off to make it easier.
(Don't you love the ab-roller in the background?)

6. Clear as mud? Okay, if so, you should now have the beginnings of a bag!
6. I edged the top of my bag with shears. If you go with the thick denim hem at the top, you can skip this step. Still living and learning here.
7. Turn your bag wrong side out again and fold the top down about 1"-1.5". This will be the casing for your ribbon drawstring.
8. Sew a small hem all the way around EXCEPT for the casing side where the thick denim hem is. This is the opening where you will loop the ribbon through.
9. When your casing is finished (this is the slip for the drawstring), attach a large safety pin to your length of ribbon to help feed it through the opening. Just keep pulling.

10. When it's all the way through, I took a needle and thread and put in a few stitches to secure the ends of the thick denim opening for the ribbon. They were running free and flappy right at the end.

 11. Now you have a finished bag!
 Yep...mine even has a little knee-worn hole that's already starting. I couldn't stop there of course, so I die cut a few felt embellishments and hand sewed them on. I strategically placed one over the start of my knee-worn hole. Aren't I nifty?

And voila! A little home for Barbies that aren't in use, or to take Barbie and friends to Grandma's for a sleepover.

Again...if something doesn't make sense, PLEASE email or leave a comment so I can clarify for you.
Thanks for stopping by!


Somewhat Simple

Wednesday, July 27, 2011

{My Favorite Apron!!}

I'm oddly so excited about my new apron! I'm a strange one. :) I've been wanting to make an apron for forever. I've looked and looked all over blogland, and although I see lots of cute ones, THE one just never stands out. Look no further for the BEST apron tutorial and pattern...and it's adjustable! 
You can find the easy tutorial over at Yards and Yards . But beware...you can get addicted! I plan to make more of these as gifts. Here's how mine turned out:
 I'm so in love with the fabric!
This took me about 2 hours to make, and I made my own bias tape. I used a lightweight denim on the backside, for the strap, and the ruffle at the bottom. I opted out of the pocket because I just personally like it better without.
I wear it whenever I'm cooking now, and no more splatter stains on a cute top!
The tutorial is so easy to follow. I've never made an apron of any kind, and I had no problems with this at all. I hope you'll make one of your own, or for someone special. I'm stylin' now while I'm cookin'!
 Here you can see how it's adjustable on the sides...very much like a pillowcase-style.

I machine stitched the ruffle for the first time, and I'll never go back to doing it by hand!


Now I might go bake something....
Take care,

Friday, July 22, 2011

{Travel Printables}

We normally stay right around town during the summer, and take our big family vacations during the school year...but this summer we've had multiple shorter road trips and really been all over.
My daughter just turned 7, and I made up these little take-alongs for all of our car trips. You could laminate them and use as wipe-offs, too!
You can download all of them here:
Scavenger Hunt 2
and for younger ones....   Places & Logos

They are Word docs, so you can change them as you see fit!  Each line on the Scavenger Hunt pages can be marked off with an 'X' or check mark, which reinforces one-to-one correspondence and counting. The Places & Logos sheet can easily be added to with places near you. We used this one a couple of years ago when Natalie was first learning to read. Your kiddo can simply put a big 'X' through each one. These can also be used just while running errands around town if you like...every item is really generic for the most part, but keeps little hands and eyes busy and gets them thinking.

And since I can't have a post with no pic...I'll leave you with this...
From one of our recent road trips to the south...my Grandma's uber-delicious, out-of-this-world chocolate pie tarts. I'll have 10, thank you!

Have a fun trip!


Monday, July 18, 2011

{USA Puzzle}

Hi there and we're back! Great visit to the great state of Tennessee. Lots of swimming, nature walks, and visits with Grandma. We're heading North in a few days, for a few days, but I wanted to post this quick map activity we did last week.

SUPER easy puzzle for any maps you want to work on!
We're working on naming and placing the continents, as well as identifying the United States on a map. We're doing other stats like number of states, north-south-east-west, the US flag and what it means, and identifying/naming the President and Vice President.

I found EXCELLENT blank outlines of continents, countries, and states over here
and couldn't stop printing.
I printed one of each continent, as well as the US on white cardstock, then "laminated" them with clear 
 contact paper.
For the US, I then did varied cuts from the bottom to top of the map to create my own puzzle.

We store them in a 5x7 manilla envelope, along with the Hawaii and Alaska. She just has to place them near there real location when she does the puzzle.

We're going to do the continents as well when we return. I made extra copies of each and laminated those, too...just for reference. Once we get back, we'll probably use that copy to outline our own state and locate familiar states (like where Disney World is, or Grandma's house) using a wipe-off marker.
Fun little geography activity that you works on-the-go, too.
Thanks for stopping by!


Monday, July 11, 2011

{Vacation Time & Updates}

Hello to you! Summer is in full swing here, and (sadly) it's also just flying by. I can't believe it's already July! We'll be on vacation next week, hangin' with my wonderful Grandma on the lake, followed by a few days with old friends and a trip to meet my sister's new (and first) baby. I can't wait!! Lots of driving both north and south coming up for us, but it will be worth it. I'm a planner though, so I'm already stressing about the details of these 3 mini-vacations. That's how I roll! So...I'm trying to take it ONE trip at a time and refrain from making massive lists and staging areas for packing around my house. Does anyone else do this?

Until then, we're off for a quick trip to the hometown this weekend. My sweet girl has been working her little booty off at swim lessons the last 2 weeks, and we're looking ahead to one more session at the end of July. She's working on front crawl, backstroke, and elementary backstroke half the length of the pool (Olympic). She's doing sooooo well, but we're still working on building up her endurance. I'm so proud of her! When she's not swimming, she's going down the water slides or off the diving board. She's growing fins I tell you!

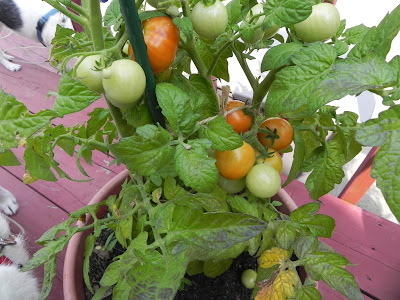
And take a look at THESE beauties!
My Cherry Maters are gettin' red! :)
My medium tomatoes are growing, too...
 You'd think I'd never seen a tomato, but I am so oddly excited about growing food for the first time ever. You can download the Growth Chart my kiddo is using to monitor them over here.

When we return from our road trips, I have a side table that desperately needs some paint, and I'm so over this bench in black. I just can't live with it anymore, which will require some stripping (not me...the paint, although my hubby would be thrilled...), which is a first for me. Should be interesting!
So pretty please stop back by in the next couple of weeks, and in the meantime...enjoy your kiddos (if you have 'em), your crafts or DIY, your significant other, and your summer!

Monday, July 4, 2011

{Scrapbooking: Writing & Drawing Samples}

Hello all!
Anyone been scrapping lately? I'm wrapping up our book for the school year, as well as plugging away at our Disney book.  For as long as it takes me to finish a scrapbook, I have a rule that the scrapbook for the school year HAS to be finished by the start of the next one. I even shoot to have it done by June, but that doesn't always happen. ;) I have only 1-2 more pages to complete this one, so I'm in good shape. Now if I can just get the one for our last Disney trip finished....(that was 7 months ago BTW). It's over half-done though, so I'm clinging to that!

My kiddo just finished Kindergarten, so the writing samples and projects greatly increased versus Pre-K. I have a file for all the best writing and art, or extra-special things, but I do like to scrapbook even the best-of-the-best of THAT file. (And as a teacher I get so excited to see all that progress!) Always before I've used a whole 12x12 page to showcase each item, which sometimes was several pages. This year I found that there were several journal pages I wanted to highlight, along with some homework, so I changed it up a bit.

Here's one of my finished layouts for this.
I chose 4 of her classroom journal pages, from the beginning of the year to the very end, so we can really see her progress.

Since I'm a super control-freak about saving, saving, saving, I start by scanning into a file on my computer all of the art/writing I want to keep.(Of course that's backed-up again, too...I'm weird like that.) Sometimes I scan and save them as photos, sometimes as documents. It depends on how I want to use them. This time around, I saved them as both, with the intent of using them as 'photos' for this layout. The nice thing about scanning them for your scrapbooks is that you can then re-print them onto acid and lignin-free paper for 
scrapbooks.
One 5x7 classroom journal page

I then printed them onto white cardstock, as a photo, so I could easily select the 5x7 size. You can also scan, copy, shrink...whatever you want if there's a different size you need. The 5x7 size worked well for this layout and made it easier, my primary reason for saving them as photos. After you print them, continue with your layout to your heart's desire.

For this one, I matted each one with cardstock, leaving room for some handwritten journaling at the bottom. Each writing sample had the date on it already, so I just ordered them that way across the page.
I think I will be doing this more and more in the coming school years, when actual photos from school days become less and less.(Sniff, sniff) But I really like how you can see some real writing progress on only a 2-page layout, and it was easy to do. I can see using multiple 3x5 or 4x6 photo sizes as well.  You could also use this same idea for reprinting and framing art or writing.

Thanks so much dropping by. I'm off to scrapbook our meeting with the Incredibles! :)

Friday, July 1, 2011

{Sleeping Bags for Barbie}

You do know she needs one... right? Of course! Every mom knows that. :)
We have entered Barbie Mania at our house as of 1 week ago. My kiddo has every single Barbie-sized Disney princess and prince, but only one Barbie up to this point, and having shown no interest at all.

But then we had a birthday party with friends.
And a Barbie arrived. A Birthday Barbie actually, which is apparently even better. Within 2 days her "birthday wish list" had changed to include mostly Barbie items.
If you hadn't guessed by now, our house is now bathed in even more pink than usual (which is always an awful lot just having a daughter around). The Barbie Glam Vacation House and the Barbie Glam Pool, along with 2 new Barbies made their big debut at our large family birthday party, and now my daughter is completely immersed in what she terms, "Barbie world".

And since "all the girls" (aka Barbies) are having a slumber party, of course they need sleeping bags, no?
So we came up with these little cuties.
I cut a template out of old file folders that measures 11" x 5 1/2".  Cut 2 of these out of the fabric of choice (felt was just too easy and I have too much of it to not use). I die cut the embellishments with my handy Cuttlebug and Sizzix dies, using felt scraps.
I used a blanket stitch for the flowers and butterflies, rolled down and stitched the top, then machine stitched the 2 pieces together to make a really simple sleeping bag. 
Barbie seems to like. :)
 There's room to move all around, so Barbie is easy to place inside and take out. I actually like the stiffness of the felt for these.
Now I'm off to play Barbies!

I appreciate you stopping by!


Creative Itch


freckled laundry
Fancy This